When building graph applications, you want to get started with graph databases and need a way to do it quickly. If you’re new to using graph databases, you may find it easy to relate to examples or demos using your own data. Specifically, you want examples that highlight the best practices in Amazon Neptune and applications that showcase the features available. These sample applications can help you right-size your cluster, model your data as a graph, provide best practices in coding, or architect your graph application for scale.
In this post, we walk through an example we released for Neptune with integration with Altimeter. Altimeter is an open-source project (MIT License) from Tableau Software, LLC that scans AWS resources and links these resources into a graph. You can store, query, and visualize the data in Neptune. You can query the graph to examine the AWS resources and their relationships in an account. For example, you can query for resources or pathways that expose a cluster with a public IP address to check for security and compliance.
Neptune is a fast, reliable, fully managed graph database service that makes it easy to build and run business critical graph applications. Neptune is a purpose-built, high-performance graph database engine optimized for storing billions of relationships and querying your graph with milliseconds latency.
Solution overview
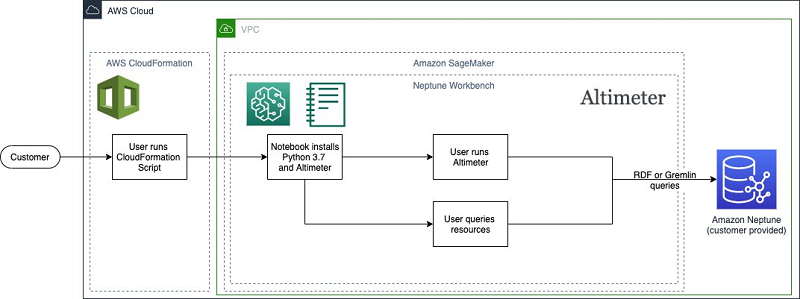
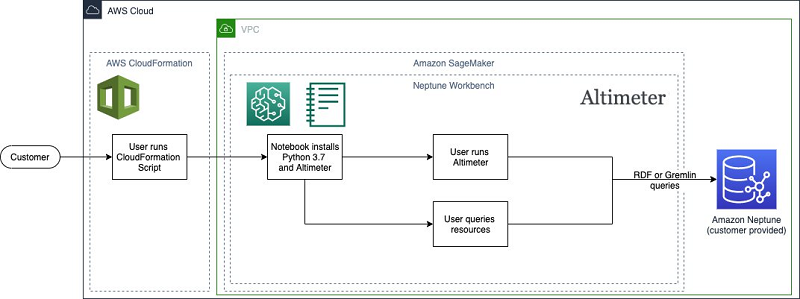
The AWS CloudFormation template associated with this post automates deploying and configuring Altimeter within a Neptune notebook. The template creates a new Neptune notebook that is associated with the specified Neptune cluster. It also installs Python 3.7, which is required for Altimeter, and installs and configures a version of Altimeter that is optimized for use inside a Neptune notebook environment.
The template interacts with or creates the following AWS resources:
- Neptune notebook – The template creates a notebook with Python 3.7 installed and a modified version of Altimeter that automatically configures the account to scan based on the AWS Identity and Access Management (IAM) permissions given to the notebook.
- Neptune cluster – The template doesn’t create this resource; you can either use an existing cluster or create a new Neptune cluster. For this post, a small Neptune cluster (t3.medium or r5.xlarge) should be sufficient for most accounts.
The following diagram illustrates this architecture.
Setting up security
Before we begin the process of creating our infrastructure, we need to configure an IAM role with sufficient permissions to allow Neptune Notebooks to install, configure, and run Altimeter. For this post, we create a role with two new policies.
- Create a role that allows Neptune Notebooks to run and connect to Amazon Simple Storage Service (Amazon S3). For instructions, see Creating a role to delegate permissions to an AWS service, and choose Amazon SageMaker as the service.
- Create an IAM policy to give us permission to run Neptune notebooks.
- Apply the permissions in the following JSON code to the policy. For instructions, see Creating policies on the JSON tab.
- Associate our policy with the new role. For instructions, see Modifying a role permissions policy (console).
- Repeat the process to create a second policy that allows us to access Amazon S3. The only difference between the earlier policy and this one is the following JSON permissions:
At this point, your newly created role should have two policies associated with it: one to allow it to run Neptune Notebooks, and one to allow it to access Amazon S3. With these policies and permissions applied to our role, we now have access to create and load our Altimeter-configured Neptune notebook.
However, our role also needs sufficient permissions to run the scan of our account resources.
- Add the following two policies:
ReadOnlyAccessAWSSupportAccess
These two policies allow Altimeter to scan and describe all the resources in the AWS account. You can limit these permissions to certain resource types, but this results in an incomplete graph of your resources.
If your Neptune cluster is configured with IAM security enabled, you also need to give this role the appropriate permissions. For more information, see Identity and Access Management in Amazon Neptune.
Running the CloudFormation template
Now that we have configured the appropriate security to run Altimeter within a Neptune notebook, we’re ready to create our infrastructure. For this post, you use an existing Neptune cluster and deploy a Neptune notebook using the CloudFormation template provided.
- Open the AWS Console, go to the CloudFormation service, Click the “Create Stack” button and paste the URL below into the Amazon S3 textbox:
https://aws-neptune-customer-samples.s3.amazonaws.com/getting-started-with-altimeter/neptune-sagemaker-getting-started-with-altimeter.json
This brings you to the AWS CloudFormation console with the template already selected.
- Choose Next.
- Fill in the parameters in the CloudFormation template.
- For
SagemakerExecutionRoleArn, use the ARN of the role we configured earlier.
- For
All the parameters in the template are required except for the NeptuneLoadFromS3RoleArn parameter. This parameter is only required if you want to bulk load data into the cluster.
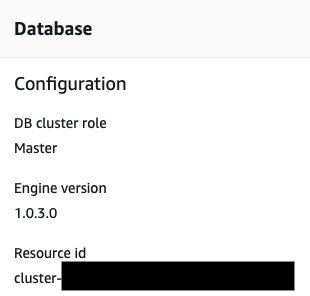
Be aware that the NeptuneClusterResourceId is not the same as the cluster or instance name. It’s located on the Configuration tab for the cluster.
- Choose Next.
- Add any desired stack options.
- Choose Next.
- Review the options selected for the notebook and choose Create stack.
After you start the stack creation, the events that occur are logged on the AWS CloudFormation console. Upon completion, the stack shows the status CREATE_COMPLETE.

Now we’re ready to begin working with Altimeter with Neptune.
- On the Neptune console, choose Notebooks.
- Select your newly created notebook.
- Choose Open notebook.

This launches the Neptune notebook instance.
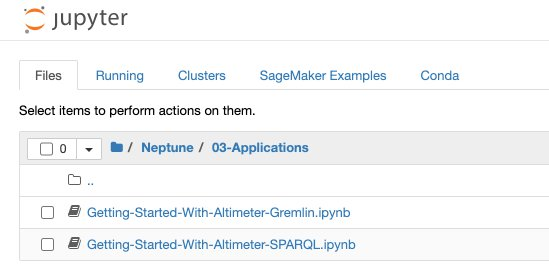
- In the instance, navigate to the
Neptunefolder and then the03-Applicationsfolder.
The folder has two notebooks: one for Gremlin (Getting-Started-With-Altimeter-Gremlin.ipynb) and one for SPARQL (Getting-Started-With-Altimeter-SPARQL.ipynb).
Running Altimeter
Now that we have Altimeter configured to run in our Neptune notebook, let’s run it and see how our AWS usage looks. The first decision to make is which data model to use: RDF or property graph. Altimeter has traditionally been used an RDF data model to represent AWS resources. This version of Altimeter has been modified to support both the RDF and property graph models. The installed version of Altimeter has also been preconfigured to perform a scan for resources available to the current account in the current Region.
To run Altimeter, create a new cell in our Jupyter notebook and enter the following command for an RDF data model:
!aws2neptune.py rdf
If you prefer a property graph model, use the following command:
!aws2neptune.py lpg
No matter the model chosen, Altimeter scans the account resources, generates a graph representation of those resources, and saves that graph into the associated Neptune instance. During this process, you see a log of the activities being performed (see the following screenshot).
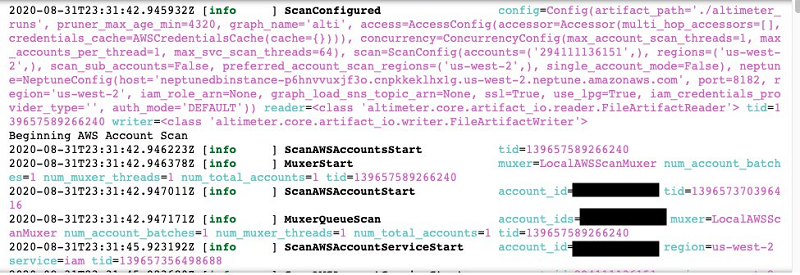
If any errors have occurred, such as your user having insufficient permissions to scan a resource, the details of the issue are displayed in the log.
Querying your AWS resources
We have loaded our AWS resource data into our account, so let’s begin querying it. Depending on the data model you chose, you’re either using SPARQL (for RDF) or Gremlin (for property graph) to query your resources.
Querying with Gremlin
Let’s start by using Gremlin to look at all the resources in our account. Enter the following code:
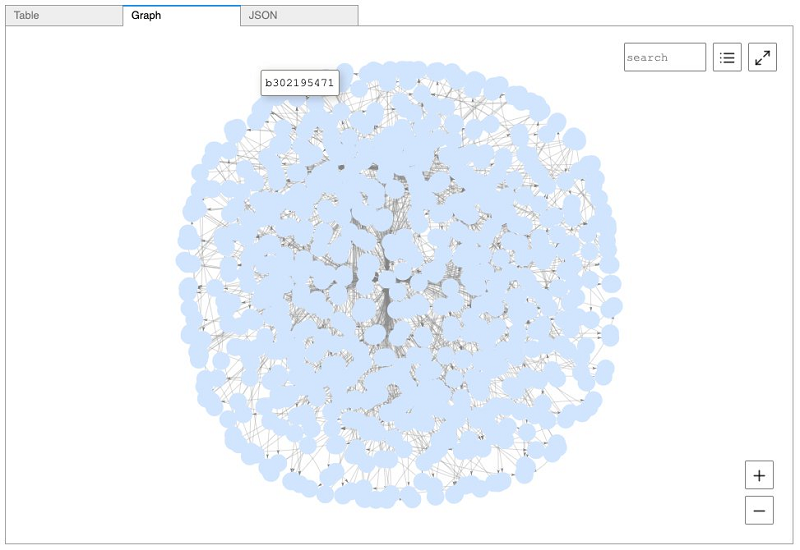
The following screenshot shows the visualized output.
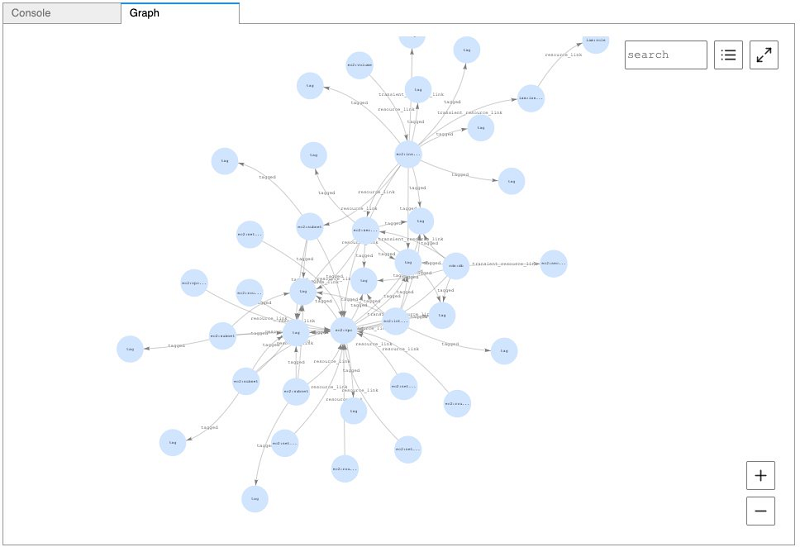
We can run queries and return data using the notebook, but we can also combine the data from Altimeter with the graph visualization functionality within Neptune Notebooks. This ability to visualize our results enables us to better understand how all the resources in our account are connected.
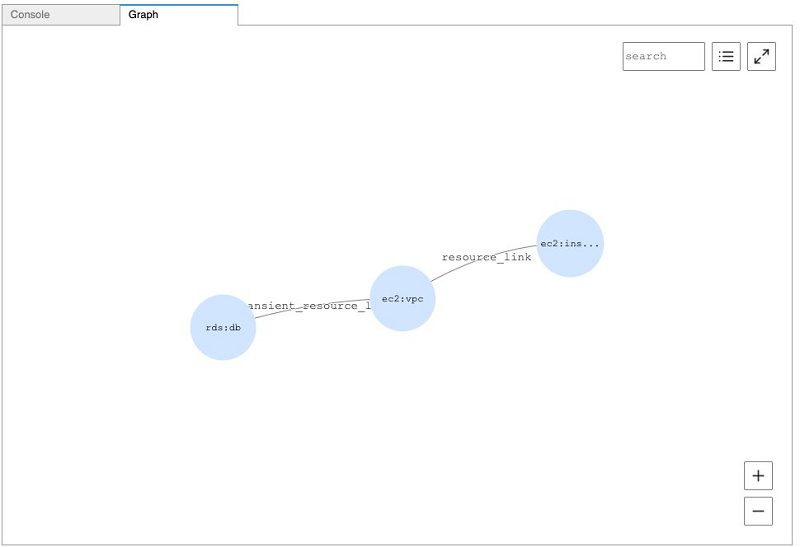
One common use of this type of resource data is look for potential security or compliance issues within an account. The connected nature of our AWS resources and the power of graph query languages allows us to easily identify potential compliance issues, such as Neptune instances that can be accessed from publicly addressable Amazon Elastic Compute Cloud (Amazon EC2) instances. See the following code:
The following screenshot shows the visualized output.
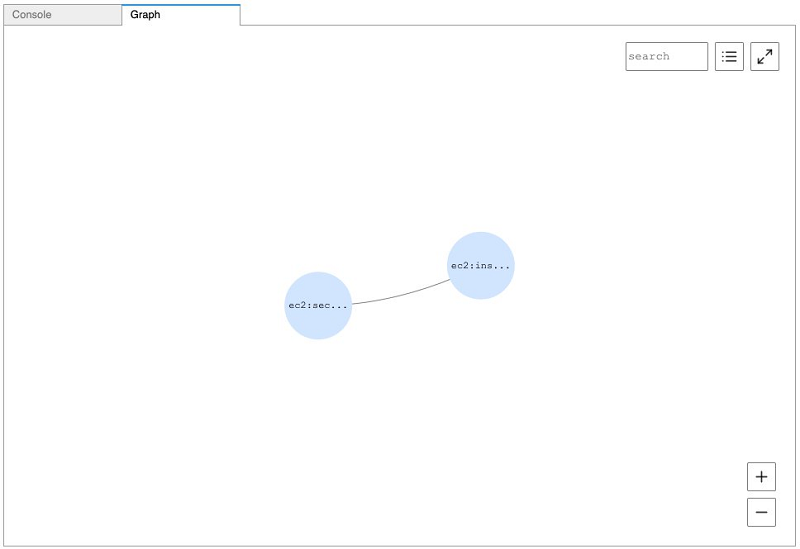
To look for publicly accessible EC2 instances, enter the following code:
The following screenshot shows the visualized output.
Querying with SPARQL
We used the property graph model and Gremlin for these example queries. We can also perform similar queries using SPARQL if we choose RDF as our data model, such as displaying all our resources. See the following code:
The following screenshot shows the visualized output.
To find all EC2 instances that allow public traffic on port 22, enter the following code:
The following screenshot shows the output.

Monitoring infrastructure over time
Although being able to run these sorts of security and compliance checks is a great tool, the real power of this functionality is being able to monitor infrastructure over time to see how your infrastructure evolves. To support this, Altimeter is capable of being rerun multiple times. Each run generates a time-versioned subgraph, identified by a scan_id property, which allows you to monitor the evolution of your infrastructure across days, months, or years.
If you’re using an RDF data model, each run is created as a separate named graph within Neptune. If you’re using a property graph, each run creates a metadata vertex containing the scan_id as well as incident edges (identified_resource) to each vertex created by the run.
You can retrieve the subgraph for a specific run in two different ways:
- Filter on all vertices with the desired
scan_id(for example,g.V().has(‘scan_id’, <scan_id>)) - Traverse from the appropriate metadata vertex (for example,
g.V().has(‘metadata’, ‘scan_id’, <scan_id>).out(‘identified_resource’))
Conclusion
This post demonstrated how to use the provided artifacts to create a Neptune notebook that is preconfigured with Altimeter. We also demonstrated how you can use Altimeter to generate and store a graph of your AWS resource utilization within Neptune. Finally, we showed you how to query this resource graph to identify security and compliance holes in your infrastructure and monitor your infrastructure for changes over time.
It’s our hope that this post provides you with the confidence to begin your journey with Neptune. If you have any questions, comments, or other feedback, we’re always available through your Amazon account manager or via the Amazon Neptune Discussion Forums.
About the Authors
 Dave Bechberger is a Sr. Graph Architect with the Amazon Neptune team. He used his years of experience working with customers to build graph database-backed applications as inspiration to co-author “Graph Databases in Action” by Manning.
