Amazon DocumentDB (with MongoDB compatibility) is a fast, scalable, highly available, and fully managed document database service that supports MongoDB workloads. Today we’re announcing compatibility with MongoDB 4.0 for Amazon DocumentDB. With this launch, you can now use atomic, consistent, isolated, and durable (ACID) transactions, open a change stream cursor for a database or cluster, and much more. For the full release notes for Amazon DocumentDB 4.0, see MongoDB 4.0 Compatibility.
In this post, I summarize what’s new in Amazon DocumentDB 4.0 and show you how to get started with Amazon DocumentDB 4.0 and transactions using an AWS Cloud9 environment.
What’s new in Amazon DocumentDB 4.0?
The following are some of the major features and capabilities that were introduced in Amazon DocumentDB 4.0. To see a full list of the new capabilities, see MongoDB 4.0 Compatibility.
- ACID Transactions – Amazon DocumentDB now supports the ability to perform transactions across multiple documents, statements, collections, and databases. Transactions simplify application development by enabling you to perform ACID operations across one or more documents within an Amazon DocumentDB cluster. For more information, see Transactions.
- Change streams – You can now open a change stream at the cluster level (
client.watch()ormongo.watch()) and the database level (db.watch()). You can also specify astartAtOperationTimeto open a change stream cursor, and extend your change stream retention period to 7 days (previously, the limit was 24 hours). For more information, see Using Change Streams with Amazon DocumentDB. - AWS DMS – You can now use AWS Database Migration Service (AWS DMS) to migrate your MongoDB 4.0 workloads to Amazon DocumentDB. AWS DMS now supports a MongoDB 4.0 source, Amazon DocumentDB 4.0 target, and an Amazon DocumentDB 3.6 source for performing upgrades between Amazon DocumentDB 3.6 and 4.0. For more information, see Using Amazon DocumentDB as a target for AWS Database Migration Service.
- Monitoring – With the addition of transactions, you can now monitor your transaction usage with five new Amazon CloudWatch metrics:
TransactionsOpen,TransactionsOpenMax,TransactionsAborted,TransactionsStarted, andTransactionsCommitted, in addition to new fields incurrentOp,ServerStatus, andprofiler. For more information, see Monitoring Amazon DocumentDB with CloudWatch. - Performance and indexing – Included in this release are multiple performance and indexing improvements: the ability to use an index with the
$lookupaggregation stage,find()queries with projections can be served directly from an index (covered query), the ability to usehint()with thefindAndModifyAPI, performance optimizations for$addToSetoperator, and improvements to reduce overall index sizes. For more information, see Release Notes. - Operators – We have added support for new aggregation operators:
$ifNull,$replaceRoot,$setIsSubset,$setInstersection,$setUnion, and$setEquals. For more information, see Supported MongoDB APIs, Operations, and Data Types. - Role based access control (RBAC) – With the
ListCollectionandListDatabasecommands, you can now optionally use theauthorizedCollectionsandauthorizedDatabasesparameters to allow users to list the collections and databases that they have permission to access without requiring thelistCollectionsandlistDatabaseroles, respectively. Users can also end their own cursors without requiring theKillCursorrole. For more information, see Restricting Database Access Using Role-Based Access Control (Built-In Roles).
Getting started with Amazon DocumentDB 4.0 and transactions
The first step is to create an AWS Cloud9 environment and an Amazon DocumentDB cluster in your default Amazon Virtual Private Cloud (Amazon VPC). For instructions on creating a default VPC, see Getting Started with Amazon VPC. This post demonstrates how to connect to your Amazon DocumentDB cluster from your AWS Cloud9 environment with a mongo shell and run a transaction. When creating AWS resources, we recommend that you follow the best practices for AWS Identity and Access Management (IAM).
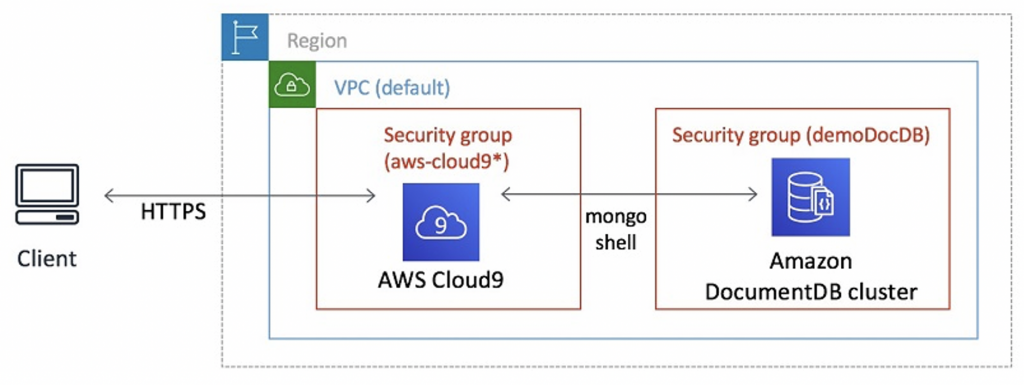
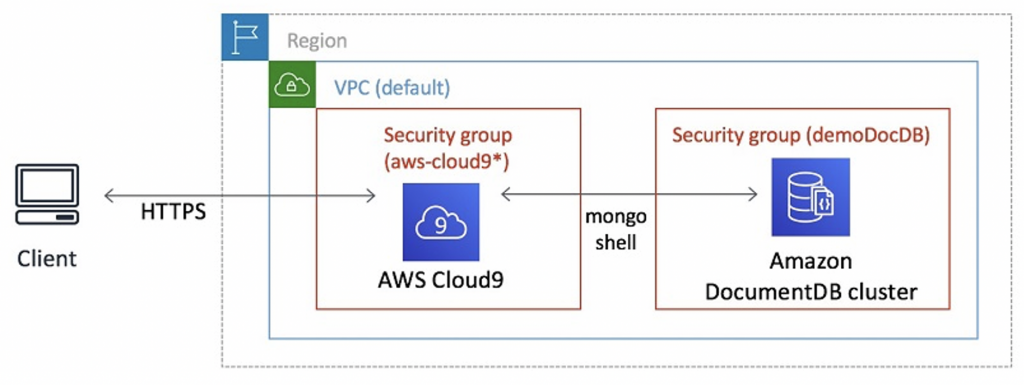
The following diagram shows the final architecture of this walkthrough.
For this walkthrough, use the default VPC in a given Region. For more information, see Creating a Virtual Private Cloud (VPC).
Creating an AWS Cloud9 environment
To create your AWS Cloud9 environment, complete the following steps:
- On the AWS Cloud9 console, choose Create environment.
- Under Environment name and description, for Name, enter a name for the environment. This post enters the name
DocumentDBCloud9. - Choose Next step.
- In the Configure settings section, accept all defaults.
- Choose Next step.
- In the Review section, choose Create environment.
The provisioning of the AWS Cloud9 environment can take up to 3 minutes. When it’s complete, you see a command prompt.
You’re redirected to the command prompt to install the mongo shell and connect to your Amazon DocumentDB cluster.
Creating a security group
In this step, you use Amazon Elastic Compute Cloud (Amazon EC2) to create a new security group that enables you to connect to your Amazon DocumentDB cluster on port 27017 (the default port for Amazon DocumentDB) from your AWS Cloud9 environment.
- On the Amazon EC2 console, under Network & Security, choose Security groups.
- Choose Create security group.
- For Security group name, enter
demoDocDB. - For VPC, accept the usage of your default VPC.
- For Description, enter a description.
- In the Inbound rules section, choose Add rule.
- For Type, choose Custom TCP Rule.
- For Port Range, enter
27017.The source security group is the security group for the AWS Cloud9 environment you just created. - To see a list of available security groups, enter
cloud9in the destination field. - Choose the security group with the name
aws-cloud9-<environment name>. - Accept all other defaults and choose Create security group.
The following screenshot shows you the security groups that were created in this step and the AWS Cloud9 security group that was created when you created an AWS Cloud9 environment.
Creating an Amazon DocumentDB 4.0 cluster
To create your Amazon DocumentDB 4.0 cluster, complete the following steps:
- On the Amazon DocumentDB console, on the Clusters page, choose Create.
- For Engine version, choose the default (4.0.0).
- On the Create Amazon DocumentDB cluster page, for Instance class, choose t3.medium.
- For Number of instances, choose 1.
This helps minimize costs. - Leave other settings at their default.
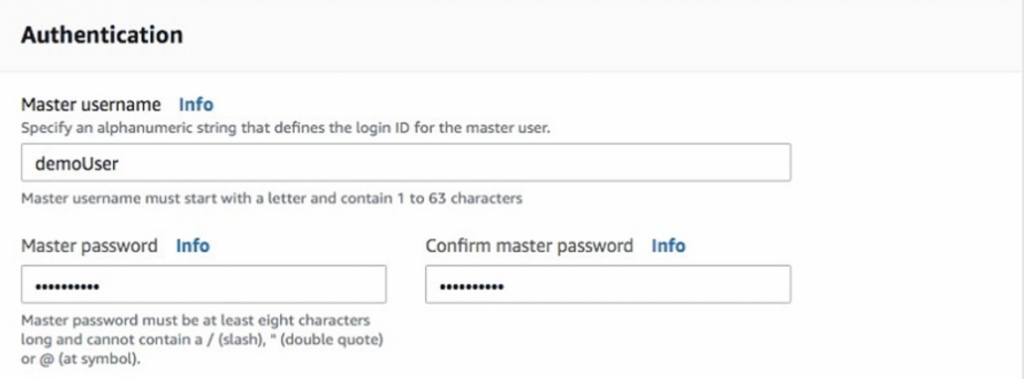
- In the Authentication section, enter a username and password.

- Turn on Show advanced settings.

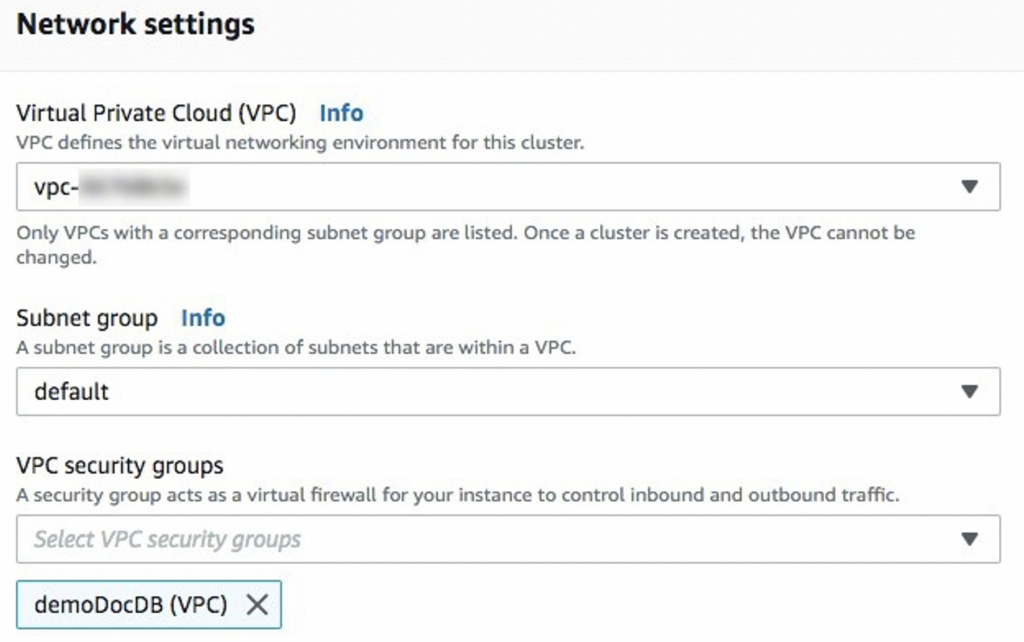
- In the Network settings section, for VPC security groups, choose demoDocDB.

- Choose Create cluster.
Amazon DocumentDB is now provisioning your cluster, which can take up to a few minutes to finish. You can connect to your cluster when both the cluster and instance status show as Available. While Amazon DocumentDB provisions the cluster, complete the remaining steps to connect to your Amazon DocumentDB cluster.
Installing the 4.0 mongo shell
You can now install the mongo shell, which is a command-line utility that you use to connect to and query your Amazon DocumentDB cluster.
- On the AWS Cloud9 console, under Your environments, choose DocumentDBCloud9.
- Choose Open IDE.
- To install the 4.0 mongo shell, at the command prompt, create the repository file with the following code:
- When it’s complete, install the mongo shell with the following code:
Transport Layer Security (TLS) is enabled by default for any new Amazon DocumentDB clusters. For more information, see Managing Amazon DocumentDB Cluster TLS Settings.
- To encrypt data in transit, download the CA certificate for Amazon DocumentDB. See the following code:
Connecting to your Amazon DocumentDB cluster
You’re now ready to connect to your Amazon DocumentDB cluster.
- On the Amazon DocumentDB console, on the Clusters page, locate your cluster. This post uses the cluster
docdb-2020-10-09-21-45-11.
- Choose the cluster you created.
- Copy the connection string provided. Omit <insertYourPassword> so that you’re prompted for the password by the mongo shell when you connect. This way, you don’t have to type your password in cleartext.
 Your connection string should look like the following screenshot.
- When you enter your password and can see the
rs0:PRIMARY>prompt, you’re successfully connected to your Amazon DocumentDB cluster.
For information about troubleshooting, see Troubleshooting Amazon DocumentDB.
When you have connected with the mongo shell, you can discover the version (4.0.0) with the following command:
You get the following output:
Using transactions
Now that you’re connected to your cluster with the mongo shell, you can explore using transactions. One of the classic use cases for transactions is debiting money from one person’s account and crediting that money in another person’s account. Because the use case deals with two separate operations in the database, it’s desirable that the two operations run within a transaction and follow the ACID properties. For this post, we transfer $400 from Bob’s bank account to Alice’s bank account. Both accounts begin with $500.
- To start from with an empty collection, first drop the account collection:
You get the following output:
- Insert data into the collection to represent Bob’s account:
You get the following output:
- Insert data into the collection to represent Alice’s account:
You get the following output:
- To start a transaction, create a session and a session object for the account:
- Within the transaction, debit $400 from Bob’s account:
You get the following output:
- Similarly, credit Alice’s account with $400:
You get the following output:
- Within the transaction, you can see both updates with the following code:
You get the following output:
- If you view outside of the transaction, the updates aren’t yet visible:
You get the following output:
- Commit the transaction and end the session:
- To see the updates, enter the following code:
You get the following output:
Cleaning up
When you complete the walkthrough, you can either stop your Amazon DocumentDB cluster to reduce costs or delete the cluster. By default, after 30 minutes of inactivity, your AWS Cloud9 environment stops the underlying EC2 instance to help save costs.
Summary
This post introduced you to MongoDB 4.0 compatibility in Amazon DocumentDB and showed you how to get started with Amazon DocumentDB 4.0 and transactions by creating an AWS Cloud9 environment, installing the mongo 4.0 shell, creating an Amazon DocumentDB cluster, connecting to your cluster, and walking through a common use case for transactions. For more information, see MongoDB 4.0 Compatibility and Transactions. For more information about recent launches and blog posts, see Amazon DocumentDB (with MongoDB compatibility) resources.
About the author

Joseph Idziorek is a Principal Product Manager at Amazon Web Services.


